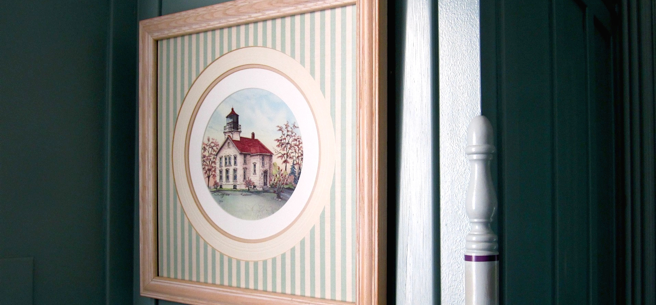
FRAMING PAPER ART


      FRAMING OPTIONS


   Choose the perfect frame that synchronizes with your imagery. 

                 
     Freehand mat cutting, as seen above, 
     produces an organic vibe to this portrait. 


            Hand painting the mat board is a sure 
            way to coordinate distinctive colors.

            
            V-grooves cut into the top mat add an elegant touch. 


The top layer of paper was cut into squares 
at the corners and peeled away to reveal 
the white mat board just below the surface.  


HANDLING ARTWORK


An inexpensive piece of paper can be worth millions of dollars when it bears imagery created by a renowned artist.  How we handle a work of art can preserve its value or ruin its value.  Framer’s gloves keep the artwork free of oil and acid bearing fingerprints that discolor and age the artwork. 
                               
FRAMING MATERIALS    


The quality of framing materials is vast (mounting backer, adhesives, mat board, frame, glass).  The best materials are archival.  These products are chemically engineered and free of acid, which causes aging, discoloration and decomposition of the paper and art media.  Archival quality is achieved in two ways: One is by neutralizing the natural acids in the framing materials.  The other is by manufacturing the paper, adhesives, and frames from naturally acid-free components.  For example, archival rag mat is made from naturally acid free cotton fiber.  Archival products extend the life of the artwork.  These materials are more expensive.


The use of regular or archival materials is a personal choice, based on the perceived value of the artwork.  The value may have more to do with sentiment than dollars, but this is still important.  The framing procedures below apply to all framing projects. 

FRAMING PROCEDURES


1.  MOUNT THE ARTWORK
Mount the artwork to a backer cut to fit your frame.  There is a variety of backer products such as foam-core, rigid plastic products, hardboard, and pressboard.  Artwork should be mounted in such a way that it can be removed from the backer for reframing in the future. 
 
  DRY MOUNT
Dry-mount is a thin sheet of paper-like material that melts around 185 degrees F.  Cut the dry-mount material to the exact size of the artwork, and sandwich it between the backer and the artwork.  A dry mount press heats and applies pressure, which melts the mounting material and fuses the art to the backer board.
 
  TAPE


Again, there are innumerable qualities of tape products.  Professional framer’s tape is acid-free, and removable.  Masking tape is atrociously acidic.  It leaches into the art, backer and mat.  It yellows and deteriorates everything it touches.  Tape should be applied to the top of the art so that it hangs freely.  Only two pieces of tape firmly applied at the top of the art is needed.  This allows the art to expand and contract with fluctuating temperatures and humidity.

  CORNER AND EDGE MOUNT


Triangular shaped corners, made of rag paper or plastic, hold the art in position, and allow the art to be removed for future reframing.  Edge mounts function the same way along the edges of the art.  Both products are available with self-adhesives.  These can also be homemade from acid-free paper and natural wheat-paste or tape for adhering them to the backer.

2.  MAT THE ARTWORK  
A mat serves as a spacer between the artwork and the glass.  The delicate surface of the art medium (pencil, charcoal, pastels, ink, watercolor, acrylics) could be easily jeopardized if it were in direct contact with the glass.


A window is cut into the mat board and placed over the mounted art.  Traditionally the mat covers the edges of the artwork.  The shape of the mat opening and the width of the mat boarder are design choices.  When framing a square or rectangle work of art, all four boarders are usually the same dimension.  Double and triple mats dress up a framing, while they can also distract from the art.      

Multiple mats are glued or taped together.  The mat (or composite of mats) is then glued or hinged-taped to the mounting board. 

      
Interestingly, this mat perfectly matches the ceiling of the room in which it hangs.  The latex ceiling paint was applied to the matt board.

3.  GLASS
Glass or Plexiglas seals the art from destructive airborne pollutants.  
There are various qualities of glass.  Some offer no glare and others are specially coated to inhibit destructive ultraviolet rays.  Sunlight and florescent light speed the aging of art.  Some UV and antireflective glass products are nearly invisible.  These greatly enhance the clear view of the art.  These products are also costly.  In most situations regular glass works well.
 
 FRAMES
 

Wood naturally contains acids, and the stained and varnished finishes emit potentially harmful vapors.  Serious archival framers go to all lengths to seal the rabbet of a wooden frame with a barrier, which blocks the mat and backer from direct contact with the wood.  The mounting board and the mat board are the first to be affected by leaching acids over time.  The actual art is mounted in the center of the backer; this is a relatively safe distance from the contaminants.  Metal frames (aluminum) are probably the most archival in nature because their surfaces are anodized or baked. 


5.  ASSEMBLY
1.   Wash both sides of the glass thoroughly.  
2.   Clean the rabbet of the frame to remove all dust and debris.  
3.   Lay the glass on top of the mounted and matted artwork.  
4.   Inspect for dust particles. 
5.   Insert the glass and art in the frame.  Inspect it again.  
  Secure the art and glass in the frame with small brads, staples, 
      or the preferred framer’s diamond points.  
  Add a dustcover to the back of the frame.  Lay a narrow bead 
      of white glue (or use a tape gun) along the edge of the frame.  
8.   Place an oversized piece of craft paper onto the wet glue.  
9.   Allow it to dry and trim the excess paper with a sharp razor-blade.  
Attach a saw tooth hanger or two screw eyes and wire.  
      Check the weight load specifications of the hangers and wire.